Peanut Cluster Cookies

Here’s another minimally sweet crunchy treat to help satisfy a cookie craving but without all the fat, calories or guilt!

  • 1½ cups whole wheat flour
  • ½ cup wheat bran
  • 1 tsp baking powder
  • 1 cup peanuts
  • 1 cup water
  • 2 apples (cored and quartered)
  • 2 dates

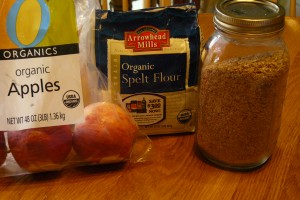
I like to use whole grain spelt flour in my kitchen but 100% whole wheat flour works fine in this little cookie cluster.  Place flour, bran and baking powder in mixing bowl.  Place your nuts in a food processor and blend until you have a smooth butter.  Meanwhile heat your water and two dates in the microwave or stovetop for 1 minute.  Add the apples (with peel!) and your warm dates and water into the processor and blend.  Mix your apple nutbutter mixture with your flour and drop by rounded spoons onto a non-stick cookie sheet or oven stone.

Back at 375° for 15 minutes.

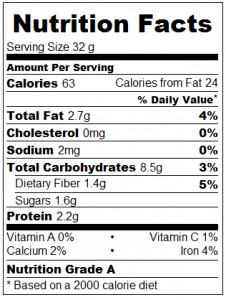
CalorieCount at About.Com gives this recipe calculation an A because of the added bran and low fat.  At just 63 calories you get 2.6 grams of protein and only 1.6 grams of sugar.

http://caloriecount.about.com

There’s nothing wrong with a couple of these and a glass of low fat milk for a quick breakfast.

Oats-N-Apple Clusters

I saw a post in my Facebook newsfeed today from a dear friend from high school who pondered her sanity for cutting back on sugar during Halloween and the upcoming holidays and I offered to send her some of my minimal sweet desserts.  And while I was hoping for pies or cakes both of which I am the master baker (!) she asked for some not-so-sweet cookie recipes.  So I went to my test kitchen and came up with three samples this afternoon … all of which my kids are busy still taste testing.  🙂

I’ve been cooking without processed sugar for years now and most of my desserts not only taste great but are good for you!  I will add a warning though, if you are use to overly sweet treats (think fast food fried apple pies) then it may be a shock to your system to try a minimally sweet treat.  But after a few years of eating healthy my kids actually prefer my cakes and cookies to store bought!  (I have great kids!!)

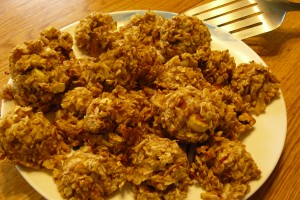
This little apple and oat cluster is perfect for VEGAN guests as well as 100% Gluten Free!  Leaving the peel on the apple provides extra fiber and the walnuts are a wonderful source of healthy omega oils.

  • 2 cups old fashion oats (not quick or instant)
  • ½ cup walnut bits
  • 1 tsp baking powder
  • 1 cup water
  • 1 date
  • 3 apples

Place your dry ingredients in a large mixing bowl.  Heat one cup of water with 1 whole date for 1 minute in the microwave or stove top.  Core and half three apples and combine with hot water and date in your food processor and pulse until apples are chunky and the date has dissolved in the mixture.

Add your apple blend to your dry ingredients and mix well.  Let your batter sit for 30 minutes so give the oats time to soften.  Drop by rounded spoon onto your cookie sheet or oven stone and back for 15 minutes in a 375° preheated oven.

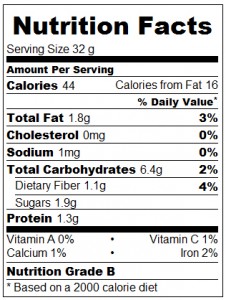
Nutrition facts provided for entertainment purposes only — I’m no rocket scientist 😉 and are based on values from http://caloriecount.about.com

At only 44 calories each these tasty morsels have only 1.9 grams of sugar.  Traditional oatmeal cookies can have 130 calories and over 7 grams of sugar each.  Plus these cookies are low in fat and have good soluble fiber from the whole grain oats!

Mock Tuna Salad

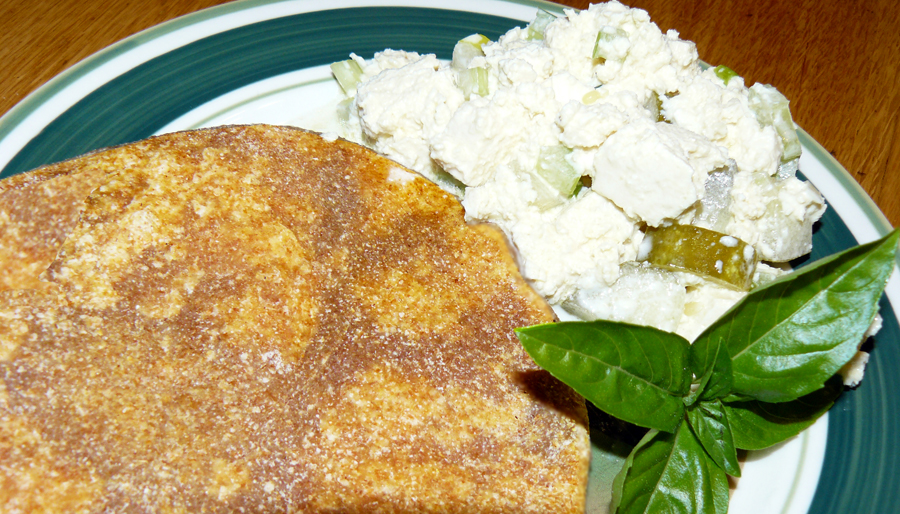
I love when a friend stops by near supper time.  My casual kitchen (read that pots and pans in the sink) is always open and our dinner table can always fit one (or more!) place settings.  Last night we were having a very casual and cold plate — tofu-tuna salad, which is perfect for our unseasonally high 100+ degree weather.  Home made pita bread and a cold pea salad certainly wasn’t elegant but it was good food among good friends — and isn’t that what life is about?

I use flaxseed in this recipe to put some healthy omega oils in the dish that would have been present if we ate actual tuna.  Remember to use VEGAN MAYONNAISE or skip the mayo altogether if you want to make this a vegan dish.

  • 14 ounces firm tofu
  • 1 TBL Flaxseed Oil
  • 1 cup chopped celery
  • 1/4 cup sliced green onion
  • 1 TBL Lemon Juice
  • 1/4 tsp Salt (0ptional)
  • 2 TBL Mayonnaise

For a “meatier” texture from your tofu, try freezing it and letting it defrost before crumbling it up for this recipe.  Slice or crumble your firm tofu in a large mixing bowl.  Add flaxseed oil, celery, onion, lemon juice and salt (if desired) and toss lightly.  If you have time, allow this to marinate in the refridgerator for at least an hour.  (I like to make mine in the early afternoon if I am serving it for supper.)

Right before serving add the mayo and mix well.

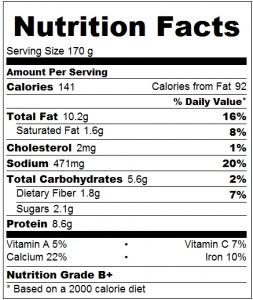
Here is the nutrition facts for your entertain purposes only, that I calculated from http://caloriecount.about.com Remember if you want to reduce calories you can use non-fat mayonnaise or skip the dressing and just serve with the light flaxseed oil toss.

http://caloriecount.about.comhttp://caloriecount.about.com

Whole Grain Waffle Recipe

I never seem to make the same waffle or pancake recipe twice.  Because I like to use what is on hand and for me cooking is so much more an art than a science.  Sometimes I’ll use up the rest of a large container of yogurt, or I’ll put a cup of my sourdough starter in the recipe if it is feeding day for my little friend.  If it is winter, I might toss some oats into my food processor to make a flour.  And if I think we are all a bit low on protein I may add some nut powder to the mix.

In our cookbook, we have a two recipes for wheat free pancake/waffle batter.  But the recipe I am going to share today uses whole grain spelt flour.  Spelt is an ancient grain that Hildegard von Bingen once wrote about in the twelfth century as “The spelt is the best of grains. It is rich and nourishing and milder than other grain. It produces a strong body and healthy blood to those who eat it and it makes the spirit of man light and cheerful. If someone is ill boil some spelt, mix it with egg and this will heal him like a fine ointment.” (http://www.spelt.com/)

I make no claims that my spelt waffle batter will heal what ails you, but it is most certainly good eats!

Ingredients:

  • 4 cups spelt flour (you can substitute whole grain flour)
  • 1 cup wheat bran
  • 1 TBS baking powder
  • 1 tsp salt (or less if you are watching your sodium)
  • 2 eggs (or 2 egg whites, or omit altogether for vegans)
  • 2 tbl olive oil
  • 2 cups whole milk (skim milk or soy milk)
  • 2 cups pure water

Mix the dry ingredients in a bowl and then add the wet items in a well inside your flour mixture and whisk until most of the large lumps are gone.

Follow the directions on your electric waffle iron.  The amount you will use per waffle depends on the size of your waffle iron.

If you are using a stove top cast iron waffle maker.  Make sure you preheat the iron on both sides for about 2-3 minutes over medium heat.  I brush a very small amount of coconut oil or olive oil on each side of my iron at the start of cooking and once or twice as I am going along or as needed.

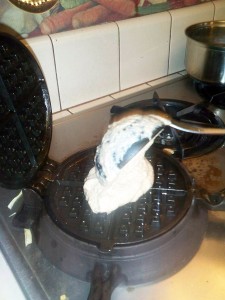
Lift the top iron and pour your batter into the center of the plate.  Close the iron and flip to begin cooking on top side first.  After two minutes (your time may vary) flip the iron again and finish cooking another two minutes on the remaning side.  Lift carefully and remove hot waffle with tongs or fork.

Top with fresh fruit if desired.  Serves about 12 and left overs freeze well!

[slideshow id=6]

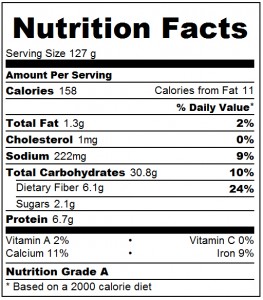
The following nutrition information is my best guess using the tools at CalorieCount.About.Com So please consider them for entertainment purposes only.  You can see what passes for “fun” at my house!  🙂

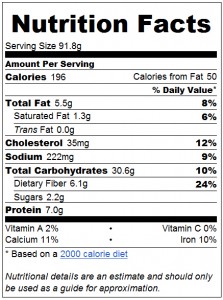
The following two nutrition facts compare the results from making the recipe with whole milk versus skim milk, whole eggs vs egg white and omitting the oil on the low cal recipe on the right.  Only two weight watcher points when made with the low fat alternatives listed above!

When made with whole milk and whole eggs. 1 serving

Low fat version (skim milk, egg white, omit oil)

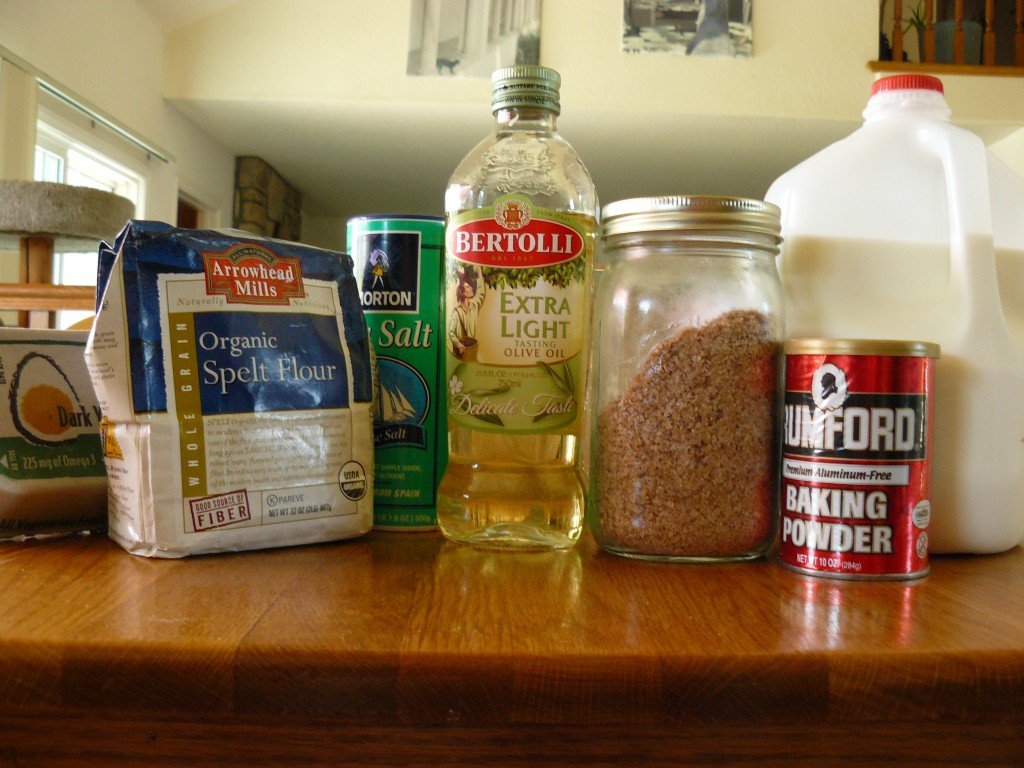
4 cups spelt flour
2 cups whole milk
1 tbl baking powder
1 tsp salt
2 eggs
2 tbl olive oil
1 cup wheat bran

1880 Eggo Waffles

1880 Eggo WafflesOne of the last appliances left in my kitchen with a non-stick surface was our waffle iron.  A few years back I ditched my old, worn and scratched teflon pans and bought some good ol’ fashion cast iron skillets.  I tossed my aluminum rice cooker and I simply love my stainless steel wok.  So why keep using a non-stick waffle iron when making my whole grain and otherwise healthy waffles for my family on the weekend?

But finding a cast iron electric waffle maker was not as easy as I had hoped.  Even the vintage waffle makers I found were all cast aluminium and though the jury may be out on the safety of aluminium cookware, in my house we practice prudent avoidance so I kept my eyes out for the perfect cast iron solution to my waffle woes.

Sure Equipex Sodir makes a restaurant quality electric waffle iron but at over $700 it seemed more than a bit extravagent for a sit down family dinner … or breakfast as it were.  Soon it became clear that I had to modify my requirements if I was to find any workable solution.  So I tossed out the “electric” in my search string and found a line of “camping gear” that seemed closer to what I had in mind.

I recall making griddle pies when I went out with my parenting group friends back in the early 1990’s.  And today’s cast iron campfire waffle maker reminded me of those wonderful cellular memories.  The only problem was that no one in the US is making cast iron campfire waffle irons.  There is one or two brands from China … but if I were to follow prudent avoidance well that’s another blog at best.

So back to my search and a happy ending that I just had to share with my foodie friends.  Introducing the Griswold American Waffle Iron!  Ok, introductions may well be a bit late on the mark since Griswold Cast iron cookware was made in the US from 1865-1950.  But the great thing about cast iron is that is stands the test of time.  These easy to be found on ebay collectibles are perfect for the antique buff as well as the home cook.

If you keep your eye out you can find a good quality home use waffle iron for under $40.  But watch for the shipping costs.  These are heavy items, and some sellers seem to charge an exorbitant price to ship.  Another thing to keep in mind is how the item may have been cleaned.  I’m not a fan of soaking my cast iron in “oven cleaner”.  Sand blasting seems safe enough.  But honestly a good scrub brush and hot water is all I have ever needed.

After much research, a few nail biting last minute ebay bids and some much needed TLC, I am now the proud owner of TWO Griswold cast iron waffle makers.  One is a smaller #7/8 that has an 1880 patent stamp on the back and the other is an 8 inch standard model dating just at the turn of the 20th century.   To be honest, I also did buy one of those “Rome” cast irons made in China for comparision purposes.  But even after a good seasoning, I must say that cooking on my 1880 vintage irons are still my hands on favorite.

Each time I make waffles on my 1880 gridiron I get to think about all the people and the hands that this waffle maker passed through.   It gives me a sense of why my husband collects coins.  And I am honored to be in the line of those who have come before me and those who will use this pan after I am gone.

The next time I make waffles, I promise to write down the ingredients and post my special whole grain recipe.  Mmmm.  Don’t these look good?

[slideshow id=5]

Bring your Kindle into the Kitchen!

Big news!  The 30-Day Vegetarian is now available on Kindle for only $3.99.

All of the photos have been converted to black and white kindle format and we have added hyperlinks all through

out the book making it easy to find your favorite recipe.

You can even down load a kindle client for FREE at Amazon.com for your computer or mobile device.

So what are you waiting for?  Go to Amazon.com and pick up your copy of The 30-Day Vegetarian for only $3.99.

Gourmet Kabobs

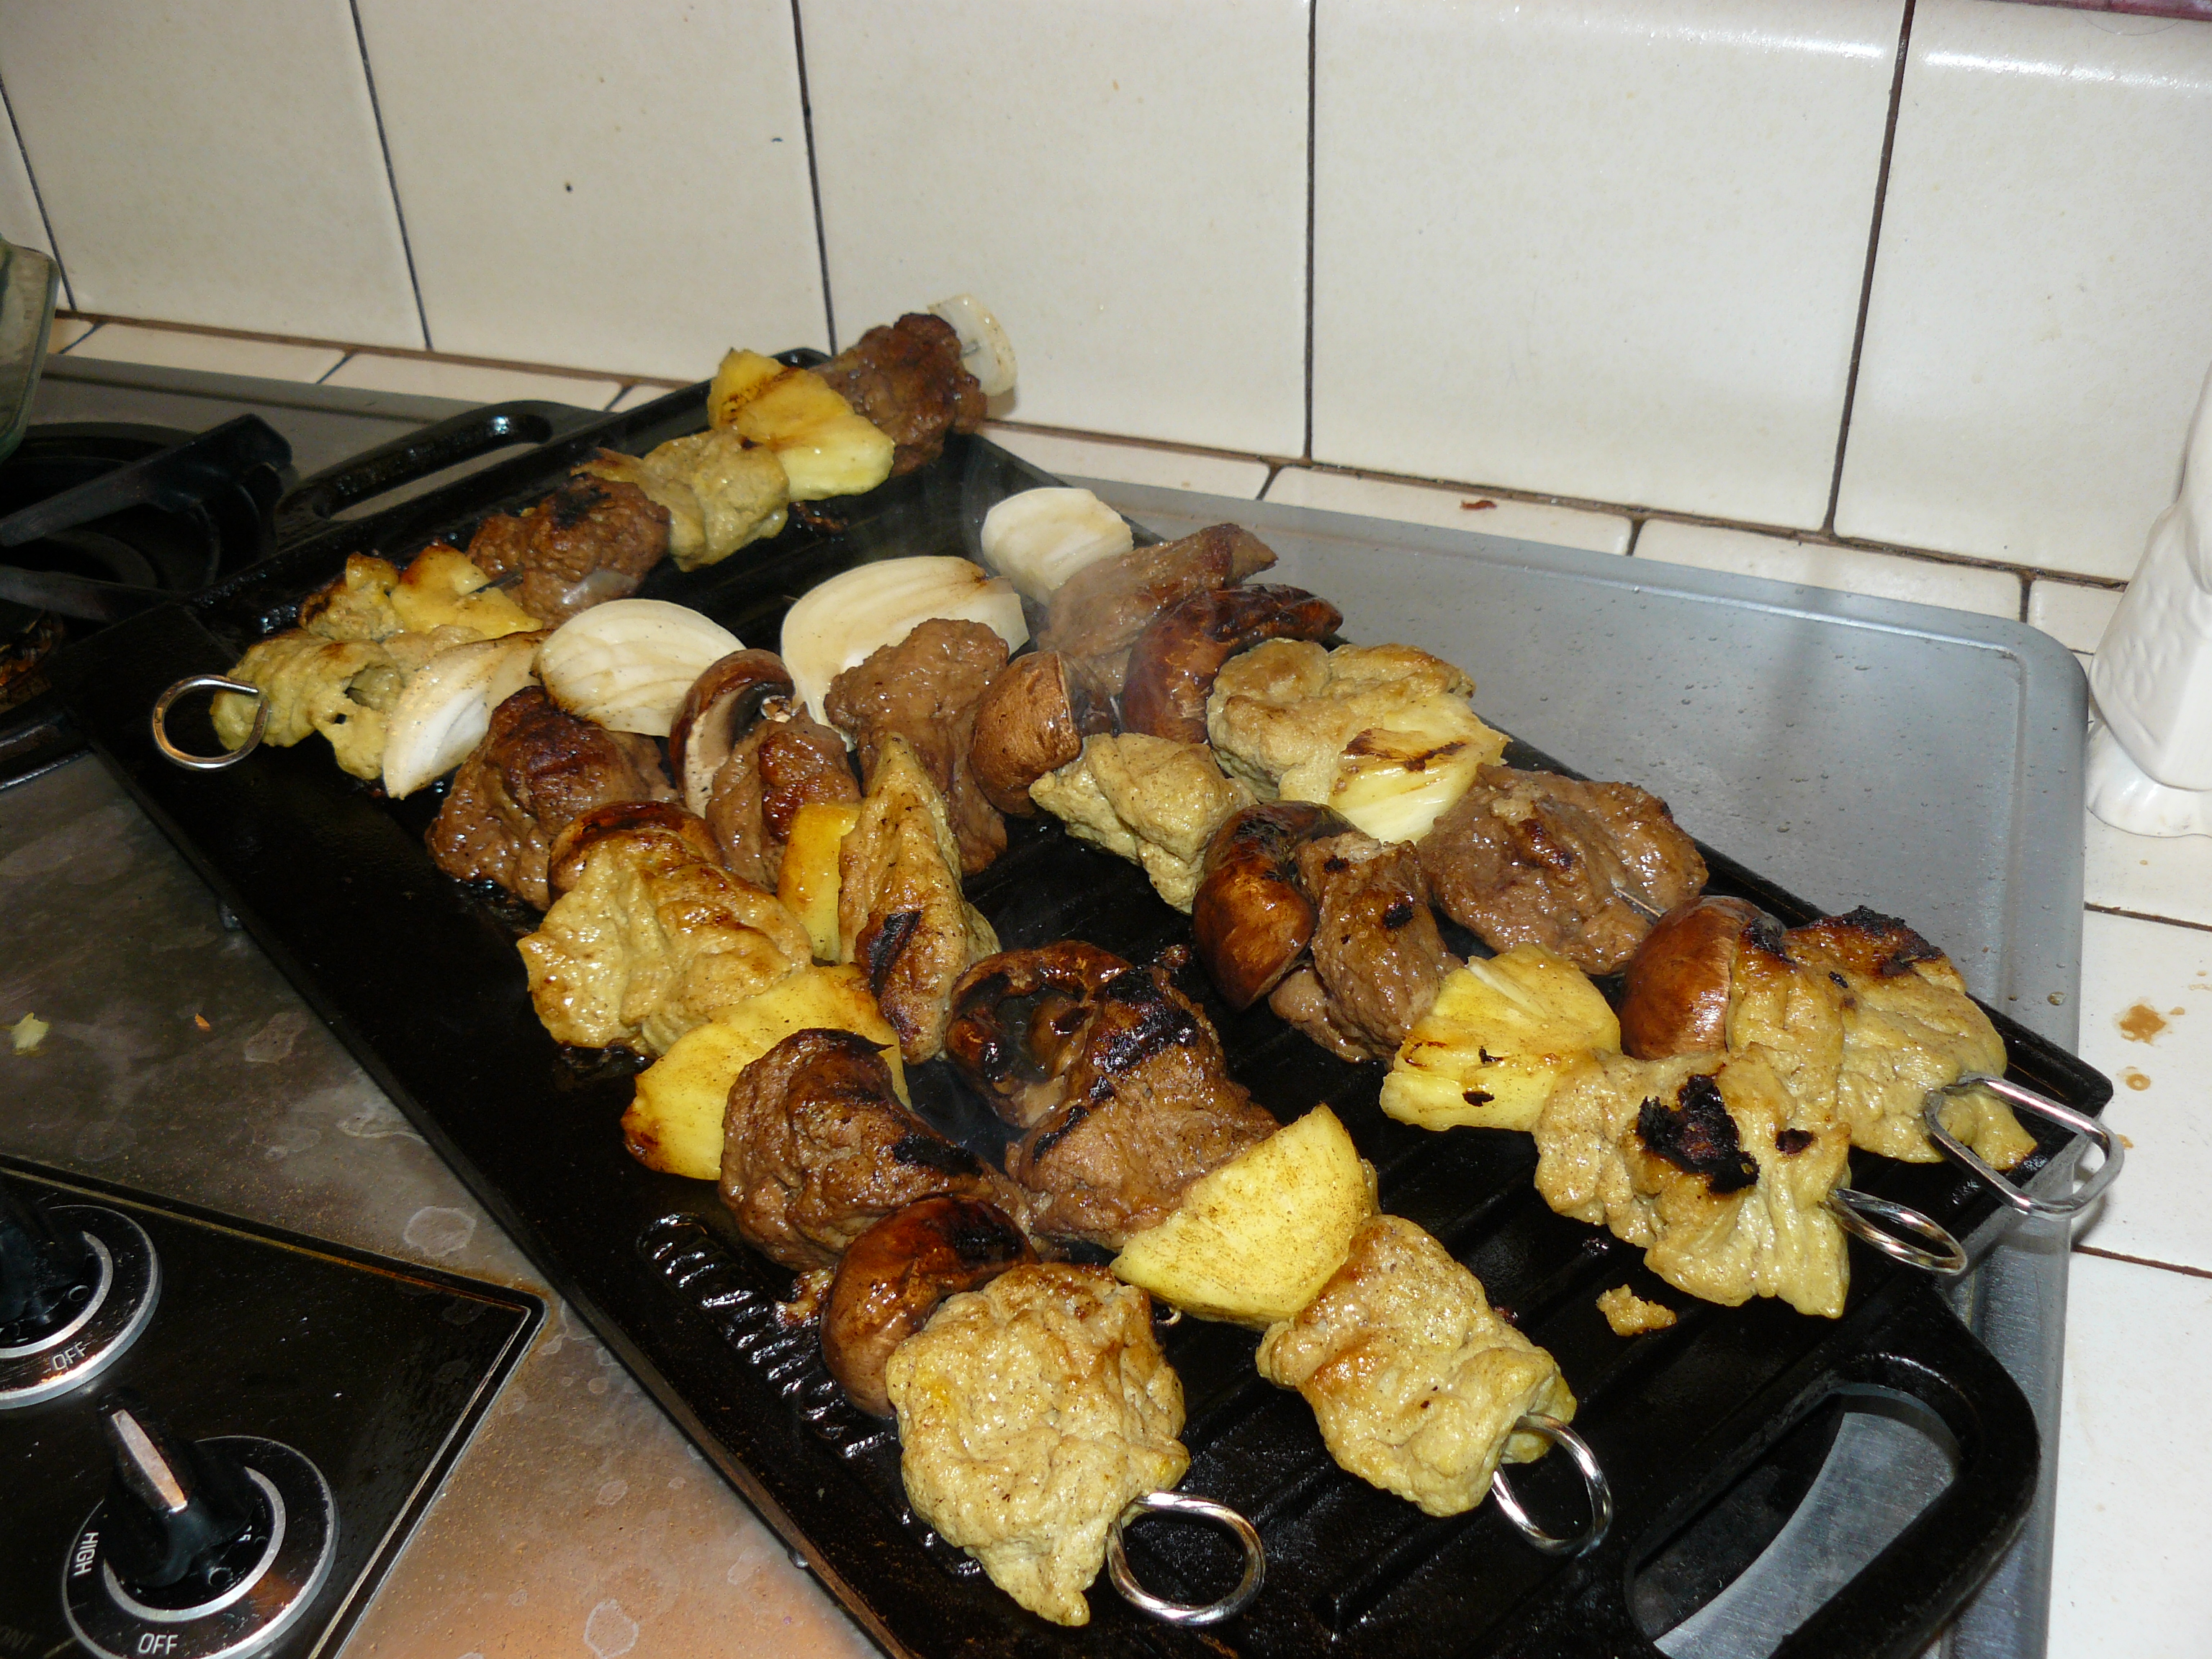
Go ahead!  Click on this photo to see it up close … then click again to ZOOM in!  Take a real good look.  If you close your eyes you can even SMELL the meat cooking on the grill.  For folks who miss the meat in their vegan lifestyle, this mixed grill with “lamb” and “chicken” will bring a tear to your eye.  It was one of those days when everything just worked well.  My kids were an amazing help.  We had mouth watering hummus, babaganoush and tzatziki.  Oh and did I mention the home made whole grain spelt pita pockets?  Everything a vegetarian would order from a good mediteranian restaurant.  But what about the grilled kabobs?  If we are lucky our favorite take-out place will offer a “vegetarian” kabob with a few grilled vegetables.  But when the veggie-entrée comes close to the price of the lamb grill it just doesn’t seem like a good value.  So tonight, we decided to make our own mixed meat kabobs!!

The recipe was simple, start with the basic seidan medallians from  our cookbook, The 30-Day Vegetarian. For tonight’s grill, I divided the raw seitan pieces into two different simmering pots.  For the “lamb” I used a combination of decaffinated black tea, pickling spice, sea salt and a few tablespoons of ketchup plus some aromatics including onion and carrots.  (Don’t leave the tea bags in the pot after they have steeped for about 5 minutes.)    For the “chicken” we used some sweet onion, sliced carrot and a good pinch of dried saffron.  The yellow broth was flavorful and gave the chickie the perfect color for our kabob.

When the seitan was done we paired the meat with some fresh mushrooms, sliced onion and fresh pineapple.  We used a simple baste of honey, tamari and butter (margarine if you are serving a vegan meal.)   But the real flavor came from our cast iron grill.  Wow.  Just a minute or two on each side was enough to leave those amazing grill marks and fill the whole house with an aroma that made our guests wonder if they were still in a vegetarian home!

Should I tell you about the no-bake sugar free blueberry pie?  🙂  As is often the mantra at our kitchen table … We Eat Well!

Babaganoush

My First Sourdough Bread!

I have been kneeding bread — on my knees if need be 🙂 for years now.  Wonderful breads like fresh dill and minced onion, columbian honey bread and cheesy herb.  In my cookbook I have recipes for whole grain spelt bagels and an assortment of muffins and waffles that are wholesome and a knotch above the sugar loaded and preservative laden “foods” we find in the mega-marts.  But in all my years of crafting the perfect whole grain spelt bread I have always “cheated” … in that I used store bought rapid rise dry yeast.  But at almost $8 for a four ounce jar these little beasties can be an expensive ingrediant in my recipe.

So this week (ok last week, because it takes that long) I decided to make my own wild yeast culture!  I realize that people have been doing this for over 4000 years but for me this was a completely new adventure.  So I did what any high-tech homebaker would do … I Googled it.  There are thousands of recipes for how to grow your own bread starter.  Some use fermentation of grapes or pinapple and some even use COMMERCIAL YEAST as one of the ingredients!  But the basic recipes … for the purists out there who consider kneeding bread a sacred art … call for only TWO INGREDIENTS:  Water and Flour.

Apparently these yeasts live in the air, all around us … all the time!  Who knew?!  It is the ultimate field of dreams … build it and they will come.  So last Tuesday I set out to make my first sourdough starter!  Ok, I actually started on Monday, but my unlabeled goop in the glass bowl got tossed down the sink by my child who was on kitchen duty that night.  Can’t blame her … who would keep pancake batter in a glass bowl out in the open?

For my basic whole grain spelt sourdough starter I used:

  • 1 ½ cups Whole Grain Spelt Flour
  • 1  ½ cups Filtered Water
  • 1 tsp Honey

(I’m not sure why I decided on using the honey.  I saw many recipes that only used water and flour … but somehow the thought of adding honey and its anti-microbial qualities just seemed like a nice idea for something that would be sitting out for the next 6 days!  Yikes.  We don’t leave food out that long unless it is hiding under the clutter in my teenagers room.  Oh, don’t go and groan — it seems to be right of passage or perhaps payback for all the gum we put under our desks back in the day.  But back to the yeast!  You place the three ingredients in a very clean (not from your teenager’s room) glass container and mix very well until you have something that looks like a thin pancake batter.  Cover with a tight fitting lid and wait.

You will want to stir your starter 2-4 times a day as it will separate and you also want a chance to bring in more fresh air (loaded with these invisible wild yeast) into your brew.  Working with whole wheat flour (and Spelt is a whole wheat grain) you will want to make sure that your starter does not go rancid while you are waiting for the culture to flourish.  It should have a light and pleasant sour smell not a foul harsh odor.  You will keep stirring your starter a few times a day for the next SIX DAYS.  Unlike some recipes that call for feeding your colony every day by adding more flour and water, this method does not add any additional ingredients during the culture.

By day 6 you should notice little bubbles in your batter and a distinct sour dough smell.  Let the baking begin!!

Unlike store bought rapid rise dry yeast which you can usually just add to your flour and kneed directly … you will need to PROOF your starter before adding it to your recipe.  This is the step that bakers call creating the sponge.  To make the sponge, take your active sourdough starter and place it in a large glass bowl and add 1 cup of spelt flour and 1 cup of warm filtered water (not hot, or you will kill the yeast colony that you just spent the last 6 days cultivating.)  Mix well again so that you have no lumps then let this sit in a warm place.  I like to use my oven with the light on.

The longer you let your starter proof, the stronger the sour dough flavor will be in your baked bread.  When you see a frothy bubbly mixture on the top of your sponge then you know the yeast is ready to be added to your recipe.  For my first attempt today, I let the yeast culture proof for four hours.   The result was a mild sour dough flavor that was wonderful and subtle.  Next time I will let one proof overnight and see how that compares.

To make your bread add one cup of the yeast sponge to your recipe and then take the remainder of the starter and place it in a glass jar with a vented lid in your refrigerator.  If you bake bread every week, you won’t need to concern yourself with feeding your starter.  You merely repeat the steps above … take the starter out of the jar, add 1 cup water and flour and let the batter proof in an open glass bowl for a few hours … use one cup for your recipe and put the rest back into a new sterile glass jar with a vented lid.

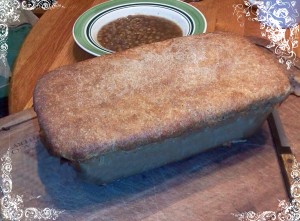
Later I will post some recipes that use the wild yeast sourdough starter.  Admittedly my first attempt still needs some tweaking.  In my case, I should have added more flour and created a stiffer dough.  The yeast in my culture over powered my soft dough and it did spill over the edge of the clay loaf pan on its second rise.  However the flavor was amazing and my dinner table of five tonight managed to eat all but two slices of the maiden loaf, along with a lovely home made lentil soup and fresh salad with warm garlic dressing.  Yum!

I realize it is not common for a woman to be so excited about yeast, but I feel like I have joined some secret society of underground bakers — or underground brewers I suppose.  Tonight my little yeast colony is spending their first night in the fridge, and I am going to be dreaming up new ways to incorporate them into brand new homemade memories.

Fried Veggie Chickie

[slideshow id=4]

I was speaking to a lovely Indian lady the other day on the phone and though she didn’t grow up with the fake meat dishes that many of us long for to appease cellular memories of our carefree carnivorous childhood, she did mention that she once had some wonderful fried vegetarian chicken and would love to make that herself at home.  At our house, fried chickie tenders are a bit hit with my family.  We use these as a staple for chickie cacciatore, chickie parmesan,  chickie fried steak with gravy or just plain fried chickie with a side of fries!  The following is a modified recipe from my basic simple seitan that is included in my cookbook.

This recipe uses a homemade seitan – which is made from vital wheat gluten.  Definitely NOT SOMETHING for people with Celiac Disease or Gluten Sensitivity.

Vital wheat gluten and is a popular ingredient in many store bought vegetarian meat alternatives.  Making seitan at home can be easy and is a frugal way to reduce your reliance on pre-packaged foods.  I make a big batch on the weekend so that I can use it for more meals during the week.

If you Google Seitan Recipes you will find a large variety of cooking methods and ingredients.   Additions of brewer’s yeast adds nutrients, tapioca pearls texture and the selection of spices can change the entire end result.  Below is my basic seitan recipe, a good choice for first time do-it-yourselfers…

Basic Simple Seitan

  • 2 ½ Cups Vital Wheat Gluten
  • 1½  Cups Vegetable Broth
  • ¼ Cup Dried Minced Onion
  • ¼ Teaspoon Sage
  • ¼ Teaspoon Thyme
  • ½ Cup Olive Oil or Melted Margarine

Gluten seizes up quickly, so you’ll need to move fast once you add the water.  Combine the gluten, 1½ cups veggie stock, minced onion, spices and olive oil in large mixing bowl.  Use a large wooden spoon to mix thoroughly, and then use your hands to need the spongy mass.  Transfer to an oiled cutting board and knead for 5-10 minutes.  Shape dough into a log and slice with a serrated knife into ½ inch thick medallions.  Bring a pot of water to boil on your stove and carefully drop the medallions into the pot cook over a very low flame for 1 hour.  Seitan will plump up considerably as it cooks.

After Seitan has been boiled you can bread it like cutlets and fry or bake, toss it into a stir-fry or use it in this simple flour dredged fried chickie.

Drain your boiled seitan and prepare your ingredients for the coating:

  • 4 Eggs
  • 2 Tablespoons Water
  • 1 Cup Whole Grain Flour
  • ½ Teaspoon Sea Salt
  • ½ Paprika (or Chilipowder if you prefer)
  • ¼ Teaspoon Sage
  • ¼ Teaspoon Thyme
  • Olive Oil for pan frying

In a shallow bowl combine your eggs and water and beat well.

On a plate mix your flour and seasonings with a fork until well blended.

Get your cast iron pan hot before adding the oil.

To prepare chickie, dip seitan into egg wash then dredge in flour making sure to coat all sides.  Carefully place in frying pan and cook 2-3 minutes over medium heat until golden brown on all sides.

Drain on paper towel and serve with your favorite dippin’ sauces.

Holiday Ideas

My Thanksgiving buffet this year consisted of a homemade Seitain Roast, bread stuffing, “pan” gravy, cranberry-mango sauce, roasted eggplant and red pepper humus lasagna, mashed potatoes, steamed green beans with salted almond slivers, fresh Italian antipasto with marinated mushrooms, mozzarella cheese and veggie ham and turkey slices, and no less than five holiday pies!

It was a feast whose preparations would have fatigued a physically fit chef, and something an individual with a chronic illness might not even consider tackling. When I first became a vegetarian a decade ago, it was important for me to try and re-create the dishes and cellular memories I had growing up in my Italian grandmother’s home. In addition to the big bird, the table was full of side dishes and obligatory lasagna. In my own family tradition I have stayed close to my Grandma Pauline’s legacy.

Below are the how-to’s and helpful hints that may offer some insight and inspiration to others who face busy schedules, dwindling energy reserves or find themselves wondering how to serve a group of family and friends an amazing meal when cooking for some people who are vegetarian or vegan.

Given my own healing adventure and the physical constraints of living with dysautonomia, I began planning our Thanksgiving meal right after Halloween. I would ask people who were coming over what where the dishes that their mothers and grandmothers made that were their family favorites. For some vegetarians, it may have been years of eating “around” the main course and nibbling only on sweet potatoes and cornbread stuffing while everyone else poured copious amounts of gravy on top of their succulent slices of aromatic turkey breast. While other vegetarians might never look back with fond memories of their carnivore past and would rather enjoy an entirely new taste experience.

After polling my family and friends, I came up with a menu that contained some foods from eveyone’s past and then I put my technology background in strategic planning to good use and set off to design a holiday meal implementation within the framework and constraints of my own situation.

The Menu

One of the first considerations was the number of baking dishes I had on hand. I recently decided to discard my aluminum pie tins and cake pans in favor of cooking only with glass or cast iron. So I scoured the internet for any pre-holiday sales and found some amazing deals on Pyrex pie plates and glass storage containers, exactly what I was looking for to move away from plastic in my kitchen. I also measured the inside of my oven and thought about how much would fit and at what common temperature I could cook certain foods together. In the three weeks prior to the holiday, I made sure to use frozen dishes and refrigerator staples so that I would have extra room to store food preparations not to mention the leftovers after the big day.

Plan Aheads

My underlying mission for the meal preparation was to have as much done in advance so that I would never be pressed for time on a day when my body may not be up for cooking. I considered what foods I could make in advance and freeze until the night before and decided to prepare the Hummus Lasagna and Fresh Spelt Bread for the stuffing the week prior.

In the days preceding Thanksgiving I made sure we had all of our ingredients on hand. Marinated mushrooms and the mango cranberry chutney could be made 1 or even 2 days in advance.
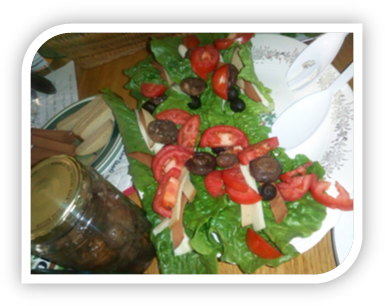
marinated mushrooms

Marinated Mushrooms for the Antipasto

Grandma Pauline always had a fresh antipasto salad for every family holiday gathering and with the addition of veggie salami, ham and turkey I think mine would make her proud.

Sauté 1 package of whole brown mushrooms with 2 TBL olive oil and 2 TBL minced dry onion over low heat with a lid on your pan. When mushrooms are tender pour the contents into a mason jar and add olive oil, vinegar and salt to taste (as you would for a fresh Italian salad dressing.) Store in the refrigerator until you are ready to use in the antipasto.

Mango-Cranberry Chutney

Want to reduce the amount of processed sugar in your family cranberry sauce? We like to use fresh fruits like dark cherry or mango to complement the tart taste of fresh cranberries. Place one package fresh cranberries with 1 bag of frozen mango and simmer on low heat in a sauce pan until all of the cranberries have popped and you have a juicy thick relish. If you like you can puree with a stick blender or place contents in your food processor to blend to your desired consistency. If the mango is not as sweet as you like, you may want to add 1 or 2 TBL of agave nectar to the chutney. Agave is a low glycemic index sweeter and usually cheaper to purchase per ounce than honey or pure maple syrup. Store in refrigerator in sealed glass jar.

Desserts
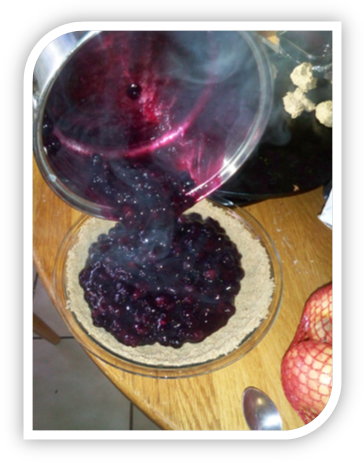
cranberry cherry pouringPie is another easy dish that can be prepared the day before and fruit fillings like blueberry or cherry and especially lemon meringue are always wonderful served chilled. In order to simplifiy our pies, we used crumb toppings and stove top cooking methods for some of our creations.

For example to make our blueberry pie, we baked 2 dozen oatmeal cookies that were sweetened only with three bananas and then processed into fine crumbs in our food processor after cooking and cooled. Our quick and easy blueberry pie filling was made with one bag of frozen no-sugar added blueberries warmed on the stove top with 2 TBL Arrowroot dissolved in 1 cup of water as a thickener. We simply pressed the warm cookie crumbs into the bottom of a deep dish pie plate and poured the thickened blueberry mixture in and topped it all with another layer of crumbs.

Both our blueberry and cherry-cranberry pies were flat on top and we found that with the addition of a piece of cardboard we could stack them in the fridge to save storage space. A big plus when you have five pies, one roast and two trays of stuffing all waiting in the queue!

The 2 dozen oatmeal cookies made enough crumb crusts that we were able to line one more deep dish pie plate so we decided to use a glazed walnut for a quick and easy topping for our Cranberry-Cherry Pie.  Our filling this time consisted of 1 package of fresh cranberries with 1 bag of frozen dark cherries (unsweetened.) When the cranberries popped and our cherries were giving up their juice, we thickened the mixture again with about half the arrowroot and water that we used for the blueberries. Meanwhile we glazed about a cup and a half of walnut pieces with melted butter and agave nectar in a fry pan over low heat.

Both pies were done in less than 20 minutes and ready to chill for the big day.

The Final Show

On Thanksgiving day we had a schedule for when each dish needed to be prepared and placed in the oven. Which was a big help since my body needed to take a break for a couple of hours during the late morning and my children were able to step right in and finish the meal without missing a beat. Having kids who know how to make a roux, separate egg whites, and caramelize onions is admittedly a big help to ensuring success. Who says too many cooks in the kitchen ruin a meal? In our house, everyone pitches in and cooking as a family is a wonderful time to teach, share and stay in touch.

Flexibility is key when you are working with unknowable factors within a chronic illness. My family and friends all know that “dinner-time” is an approximate guess and if things don’t work out as planned we simply go to Plan B. Whether we eat a home cooked meal, or order take-out Pizza …. It is as always the thought that counts and the good times shared with good people as we joke and laugh about our life’s journey.